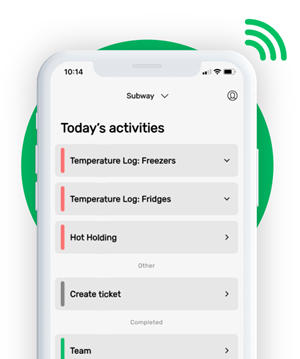


This is how our Digital Food Safety platform saves 20% of your time on daily tasks:
- Get upcoming task notifications
- Add data into the app
- Check the status of tasks in real-time

When food safety was still handled on paper, I typically spent a couple of hours per day getting the papers and going around checking or completing tasks… Now I can sit down and it's just all there in one place. It takes me 5-10 minutes.
Ruth B.
Store Manager
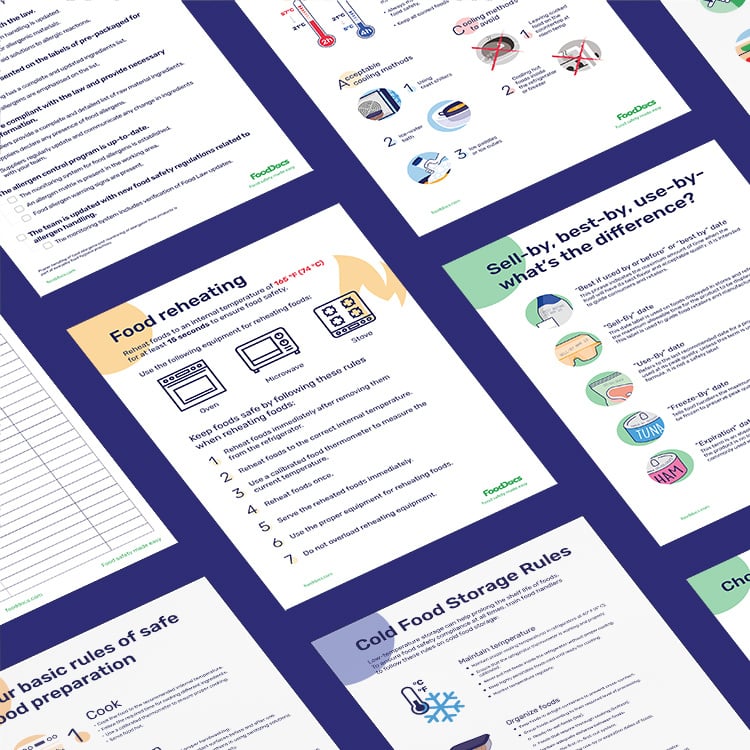
Top 6 Free Restaurant Management and Safety Resources

What are the main benefits of using a kitchen prep list?
Using a daily prep list brings several concrete benefits to any commercial kitchen:
- Reduces food waste: Accurate par levels on the prep sheet prevent the team from over-prepping ingredients that won’t be used, thus cutting down on food waste. Prepping only what’s needed means less excess wilting in the walk-in.
- Helps you meet demand: No chef wants to 86 a best-selling menu item at 7 PM. Prep lists help ensure you meet customer demand by having sufficient portions of each component ready, so you never miss out on a sale due to a lack of prep.
- Speeds up service and reduces wait times: When the right tasks are completed before the rush, line cooks can assemble dishes quickly. Proper prep reduces guest wait times because the ingredients are cleaned, cut, and measured in advance.
- Keeps the kitchen organized: An organized prep sheet keeps the prep team focused and on-task. Everyone knows what needs to be done and who’s doing it, which speeds up prep work and ensures nothing is overlooked. This organization early in the day translates to a more streamlined, less chaotic operation during service.
Successful kitchen prep starts with a well-crafted prep list. It’s a simple tool that has a powerful impact on food cost control, food quality, and service efficiency.
What’s the anatomy of a kitchen prep sheet?
So, what does a kitchen prep list actually look like? Most prep sheets use an easy-to-read grid or table format. While specific layouts can vary, a typical prep list includes the following five columns or elements:
- Menu item / ingredient: The specific food item that needs prepping (e.g. “Romaine Lettuce,” “Tomato Soup,” “Chicken Breast, diced”).
- Par level: The target quantity needed for that item for the day or shift. The par is usually based on expected sales or covers. For example, if you usually sell 25 orders of a dish that uses rice, the par for cooked rice might be enough for 25 portions. Par levels are often given in kitchen-friendly units (e.g. “3 pans of salad greens” or “5 lbs of diced onions”).
- Quantity on hand (QOH): How much of that item is already prepped and available from previous shifts or earlier prep. Before doing new prep, the team checks what’s left from yesterday or from the morning deliveries.
- Quantity to prep: The amount that needs to be prepped today to reach the par level. This is usually calculated as Par minus Quantity on Hand. If the par is 3 pans of lettuce and you already have 1 pan left from yesterday, for example, you need to prep 2 more pans.
- Actual prepped / total: After prepping, the sheet will record how much was actually prepped and the new total on hand. Often this is just a confirmation that QOH + prepped = Par (or the required total). There may also be a space for the prep cook’s initials or signature once the task is done.
One crucial element on prep lists is the concept of Par Level. A par level is the optimal amount of each ingredient or prep item that should be on hand to meet the anticipated demand for a given service.
Setting par levels is a balancing act: too high and you waste food, too low and you might kick yourself for running out and losing sales. Par levels are determined by historical sales data, portion sizes, and sometimes gut feeling/experience.
For example, if on Fridays you typically go through 25 orders of fish and chips, you’d set a par of the ingredients (battered fish, portioned fries, tartar sauce, etc.) sufficient for at least 25 orders. If you consistently find you’re short or have excess, the par level needs adjustment. We’ll dig into how to fine-tune par levels shortly.


What are examples of daily and weekly prep lists?
Daily kitchen prep lists cover what you need for today. Weekly kitchen prep lists cover your base work for the week.
Daily prep list focus
- Salad greens washed and spun
- Cut vegetables
- Cooked grains and rice
- Backup sauces and dressings
- Portioned proteins
- Garnishes and toppings

Weekly prep list focus
- Stocks and broths
- Demi and mother sauces
- Marinades and brines
- Pickles and ferments
- Spice blends and rubs
- Doughs and batters for freezing
How to use both types of prep lists
- Build the weekly list from your core menu
- Feed the daily list from those base items
- Review both on Mondays and Fridays (and adjust)
What are the 10 steps to using a kitchen prep list?
Having a prep list is only half the battle. Your team also needs to use it correctly. Using a kitchen prep list becomes second nature once you get the hang of a few basic steps.
Here’s a straightforward procedure to follow each day when executing your prep, adapted from the 10 most common best practices:
- Review the menu and stations: First, make sure you have the right prep sheet for the upcoming service (e.g., lunch vs. dinner, or specific stations like salad prep, grill, etc.). Some kitchens use separate prep lists per station to stay organized.
- Locate each item on the list: Go through the prep list one item at a time. For each ingredient or component (say, marinara sauce or diced onions), identify it in the first column of the sheet. The list may be grouped by station or category to make this easier.
- Note the par level: For the item, check the par level listed. This is your target quantity for that item for today. Keep this number in mind because it’s what you need to end up with after prepping.

- Check quantity on hand: Before you start chopping or cooking, see what’s already on hand from previous prep or deliveries. Look in the fridges, storage, or yesterday’s labeled containers. Is there leftover soup from yesterday? Do you have any diced onions remaining from the morning delivery? Count or measure what you have and note it.
- Verify quality of leftovers: If you do find pre-prepped items from before, ensure they’re still good to use. Discard anything that’s past its prime, including wilted greens, sauce that’s been held too long, etc. Only wholesome, safe, and high-quality leftovers should count toward today’s prep.
- Calculate what to prep: Now do the simple math: Par Level - On Hand = Amount to Prep. For example, if the par is 3 pans of salad greens and you have 1 pan left, you need to prep 2 more pans of fresh greens. This calculation ensures you top up to the required par without overshooting.
- Get prepping: Perform the prep work for that item. This could be chopping, cooking, mixing, or other related tasks. Focus on one item at a time so you can measure accurately and not miss anything.
- Record the results: Once the task is complete, record on the sheet how much you prepped and, if required, sign or initial that line. For instance, if you were to prep those 2 pans of salad greens, mark “2 pans prepped” (some sheets have a column for “Qty Prepped”) and add your initials to show accountability.
- Label everything: Immediately label the prepped food item’s container with the date, time, and your name or initials (if not already portioned in dated containers). This is Food Safety 101: labels ensure first-in, first-out usage and traceability. It also helps the next shift or your chef quickly identify what was prepped and when.
- Store properly and move on: Place the prepped item in its proper food storage location. This could be in the walk-in cooler, the line’s reach-in, or the dry storage. Make sure it’s covered and stored at the right temperature. Then, go back to the list and proceed to the next item, repeating the process.
Following these steps, item by item, ensures that by the time you’re done, every required prep task is completed and documented. A good prep list should have everything checked off before service starts. Many kitchen teams have one person coordinate or double-check the prep list (often a sous chef or kitchen manager), making sure nothing is skipped.
When every item’s prepped and accounted for, you and your team can head into service confident that you won’t be caught off guard.
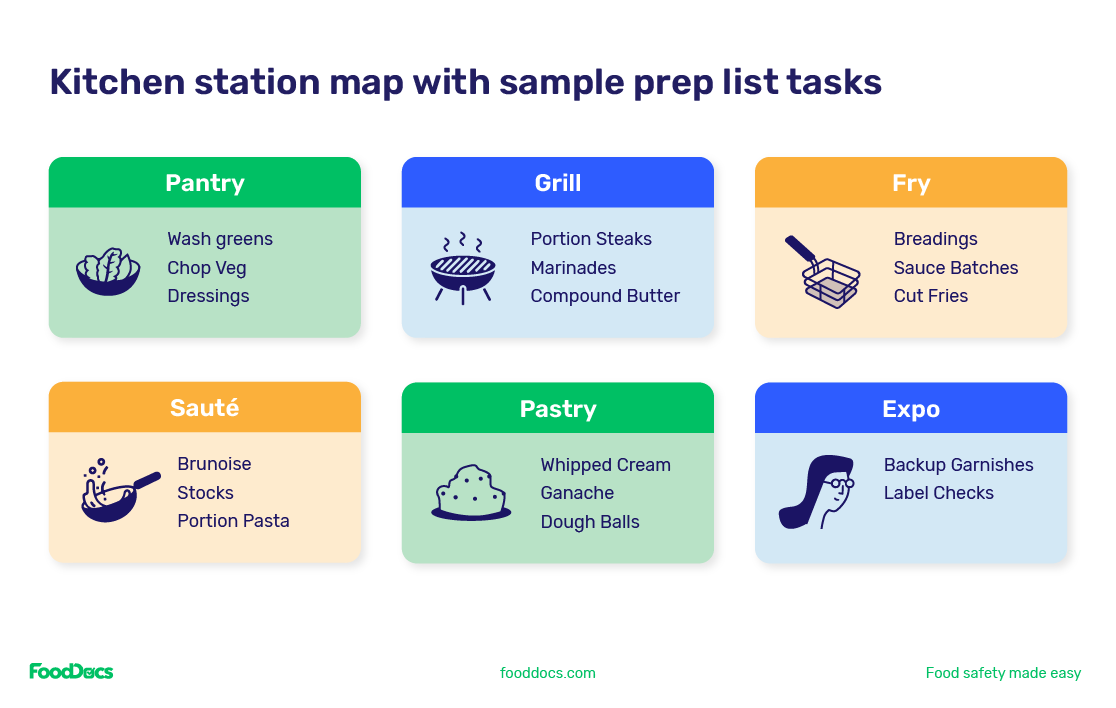
What are some examples of station-based prep?
Here’s the station based prep section in a simple table.
|
Station |
Item |
Par |
Key steps |
|
Pantry |
Romaine hearts |
3 pans |
Wash. Spin. Chill. Label. |
|
Pantry |
Cherry tomatoes |
2 quarts |
Rinse. Halve. Label. |
|
Pantry |
Ranch dressing |
1 gallon |
Mix. Chill. Label with use by. |
|
Grill |
NY strip 10 ounce |
24 portions |
Trim. Portion. Wrap. Label. |
|
Grill |
Chimichurri |
2 quarts |
Chop. Mix. Label. |
|
Grill |
Compound butter |
2 rolls |
Mix. Roll. Chill. Slice for service. |
|
Fry |
Cut fries |
2 hotel pans |
Soak. Rinse. Blanch if used. Label. |
|
Fry |
Breading mix |
1 Cambro |
Mix dry. Label. |
|
Pastry |
Whipped cream |
2 quarts |
Whip. Chill. Label. |
|
Pastry |
Chocolate ganache |
1 hotel pan |
Cook. Chill flat. Label. |
What can you do to ensure proper labeling, shelf life, and food storage during prep?
Clear labels and smart storage keep food safe and cut waste.
Consider adding these fields:
- Date and time prepped
- Use by date
- Storage location and temperature
- Prep cook initials
Common shelf life guides include:
- Cut leafy greens, 2-day shelf life stored cold
- Cooked rice, 2-day shelf life, stored cold
- Cooked proteins, 3-day shelf life stored cold
- Egg- or dairy-based sauces, 3-day shelf life stored cold
- Oil-based dressings, 5 to 7-day shelf life stored cold
Of course, you’ll need to set your limits according to your chef and local code.
As a best practice, follow these food storage tips:
- Use shallow pans for fast cooling
- Keep lids loose until Items are cold
- Place newer batches behind older batches
- Post a small FIFO sign in each cooler

What are some tips for keeping your team consistent when calculating yields, scaling batches and making conversions?
Put the math in one place so anyone can scale a recipe or a par.
Quick conversions
- 1 gallon equals 16 cups
- 1 cup equals 8 fluid ounces
- 1 pound of diced onion equals ~3 cups
- 1 bunch of chopped parsley equals ~1 cup (loose)
Scaling tip
- Add a “Portions Needed” cell on your sheet
- Let a formula fill “To Prep” based on portions
- Link it to expected covers or reservations
Yield notes
- Record how much a batch makes after trim or cook off
- Update your recipe card so the next batch is accurate

How can keeping a waste log and par tuning support an effective kitchen prep list?
A small restaurant waste log will pay for itself in a week.
Track:
- Item
- Amount tossed
- Reason
- Shift
- Cook initials
Tune pars weekly:
- If you toss it two days in a row, drop the par
- If you run out to days in a row, raise the par
- Recheck after one week and lock the new par
How can FoodDocs' software support your kitchen prep tasks?
Digital restaurant prep lists mean easier monitoring and compliance.
FoodDocs’ digital restaurant Food Safety Management System, which includes features perfectly suited for managing kitchen prep lists, cleaning checklists, food temperature logs, and more. The restaurant software uses smart automation to create digital monitoring logs and checklists tailored to your exact operations, with full customizability (if needed).
For example, when setting up FoodDocs for your restaurant, you could have it produce a daily “Kitchen Prep Tasks” checklist as part of your food safety routine. This checklist would live in the FoodDocs mobile app, and your prep cooks could tick off tasks on their smartphone or tablet as soon as they’re completed.
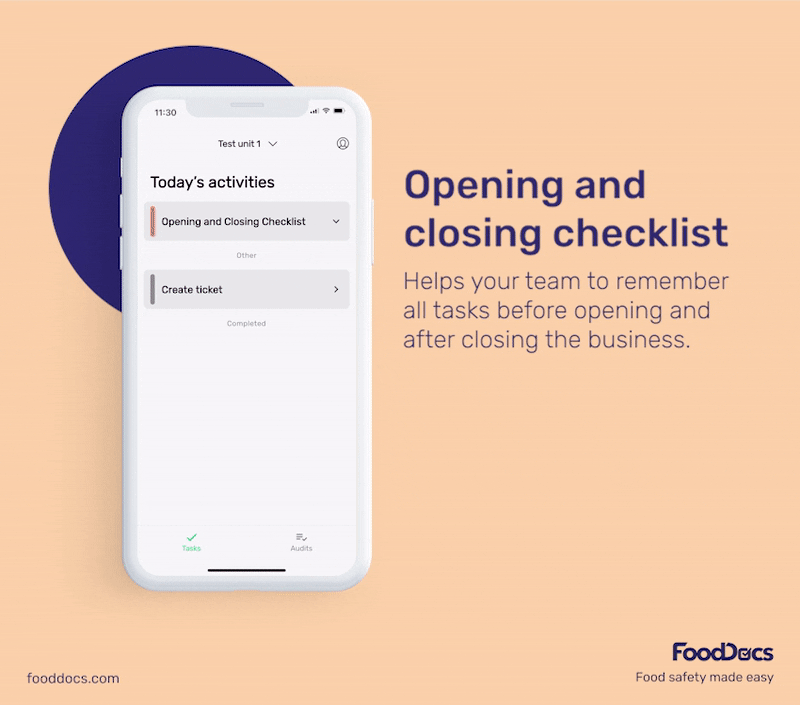

Restaurant Managers and Executive Chefs can also assign tasks to specific team members based on their roles. During the setup, you can specify which tasks go to which station or cook, and each person will see only the tasks relevant to them on a given day.
This role-based approach means a prep cook in the pastry section isn’t distracted by prep tasks for the grill station, and vice versa. It brings clarity and accountability: everyone knows their duties, and managers can see at a glance who’s responsible for each item.
FoodDocs also integrates educational instructions and media into the checklists. All digital logs and checklists come with built-in step-by-step instructions on how to perform the tasks correctly. You can even upload your own photos or training videos for your recipes and prep tasks.
This is helpful for maintaining consistency and training new staff. Imagine a new prep cook being able to tap on a task in the app (say, “Prep Hollandaise Sauce”) and instantly see the recipe card or a short video of the head chef demonstrating the steps.


FoodDocs’ Smart Recipe Book feature is essentially a digital recipe library that complements the prep list by ensuring your team has all the preparation instructions and recipes at their fingertips.
Recipes can be organized and stored in the cloud, complete with allergen info and even photos of each step, so your crew always follows the same standards.

This not only saves time on training, but ensures that the quality of prepped components (sauces, mixes, batters, etc.) is consistent no matter who is on duty.
Organization is the foundation of great cooking. When you master your kitchen prep lists (and leverage digital tools to enhance them), you’re setting your team up for success before the first ticket of the night even prints.
Try FoodDocs with a 14-day free trial!
Frequently asked questions about kitchen prep lists

![]() An automated setup enables you to go digital in 15 minutes
An automated setup enables you to go digital in 15 minutes
![]() Our app notifications help your team to remember all daily tasks bam
Our app notifications help your team to remember all daily tasks bam
![]() Save time on supervising and use automatically filled monitoring sheets
Save time on supervising and use automatically filled monitoring sheets