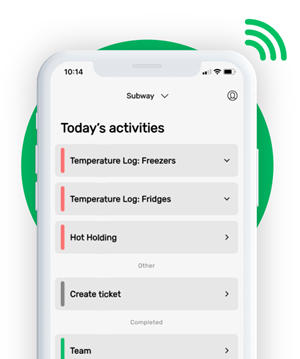


This is how our Digital Food Safety platform saves 20% of your time on daily tasks:
- Get upcoming task notifications
- Add data into the app
- Check the status of tasks in real-time

When food safety was still handled on paper, I typically spent a couple of hours per day getting the papers and going around checking or completing tasks… Now I can sit down and it's just all there in one place. It takes me 5-10 minutes.
Ruth B.
Store Manager
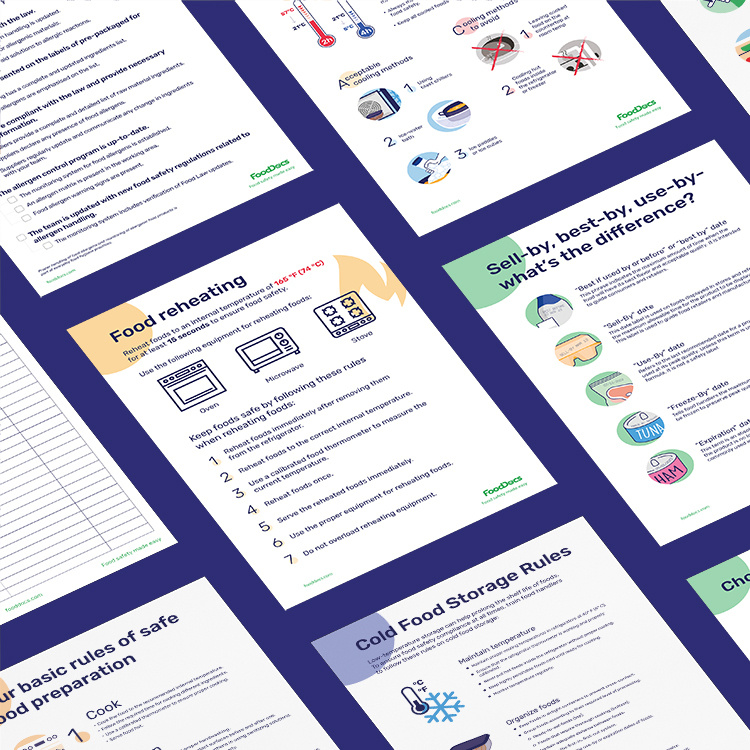
Get these 6 popular restaurant food safety resources (free)
Why does inventory management matter in restaurants?
Here are four reasons:
- Cost control: Ingredients that spoil on the shelf are essentially dollars in the trash. Studies show 4-10% of food purchased by foodservice operations is discarded before ever reaching a plate. Over-ordering ties up cash and leads to spoilage, while under-ordering means you might 86 menu items and miss out on sales. By managing inventory closely, you purchase only what you need, minimizing waste and maximizing profit.
- Consistent menu availability: Nothing frustrates a diner more than hearing their favorite dish is unavailable due to an ingredient stockout. Good inventory management helps ensure you always have the key ingredients for your menu. This consistency keeps customers happy and prevents negative reviews or lost patronage because you “ran out” of something.
- Operational efficiency: When kitchen staff know exactly what and how much stock is on hand, they can plan prep and menus efficiently. Chefs can create specials to use up surplus ingredients, and cooks won’t waste time searching for items that aren’t there. A well-organized inventory system streamlines workflows and reduces the chaos during service.
- Food safety and compliance: Keeping track of expiration dates and rotating stock ensures that only fresh, safe ingredients are used. By using older inventory first and never letting products sit past their expiry, you reduce the risk of foodborne illness and comply with health regulations.

How are restaurants using inventory templates to better manage stock?
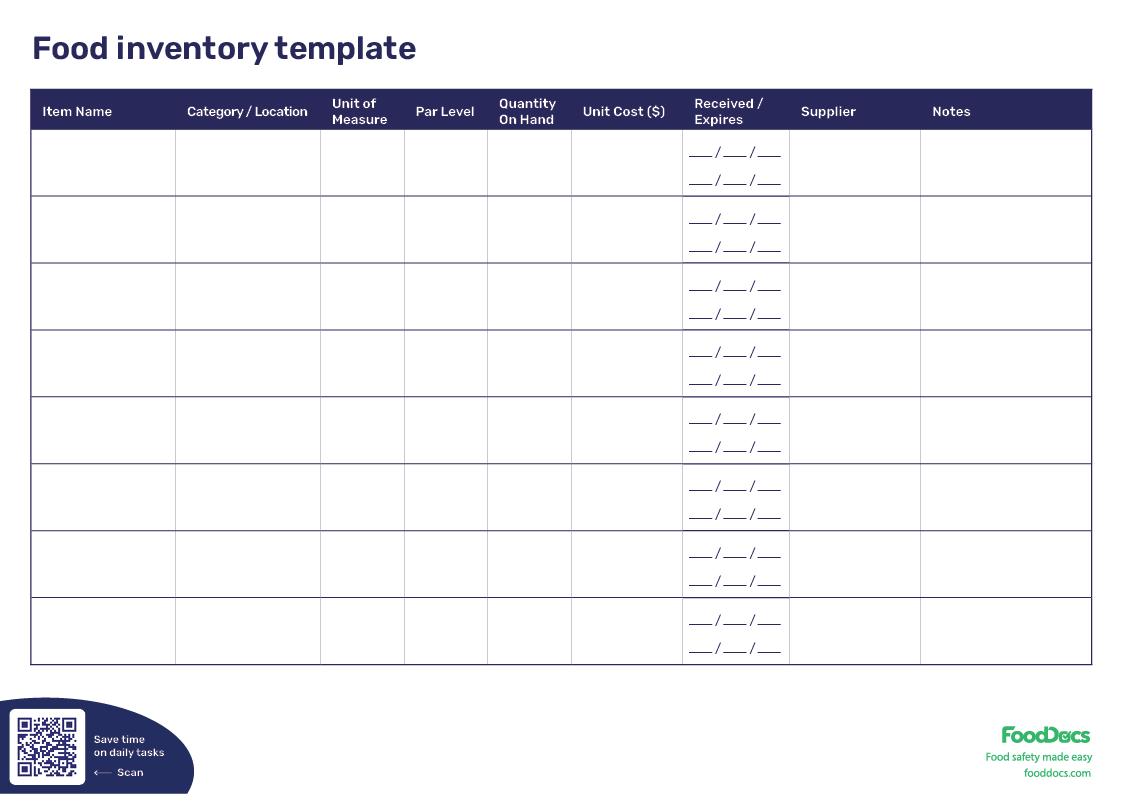
A restaurant inventory template is a standardized sheet (or digital spreadsheet) where you record all the food, beverage, and supply items your restaurant keeps in stock. It serves as a central list of everything in your kitchen or storeroom, along with details that help you track quantity and value.
A basic restaurant inventory template typically includes columns for each item’s name, the category it belongs to, the unit of measure, the current amount on hand, the unit price, and the total cost or value of that item in stock.
Filling out this information gives restaurant managers instant visibility into up-to-date stock levels. For example, you'll be able to see that you have on hand, tomatoes - 10 lbs at $2/lb (total $20) or coffee beans - 2 cases at $50/case (total $100).
What items should appear on the inventory sheet?
In short: everything your back-of-house needs to operate should appear on your restaurant inventory sheet. That includes all food ingredients (e.g., spices and produce to meat and dairy), as well as beverages (e.g., coffee, bar liquor, etc.), and even non-food supplies like cleaning chemicals, paper goods, and disposables.
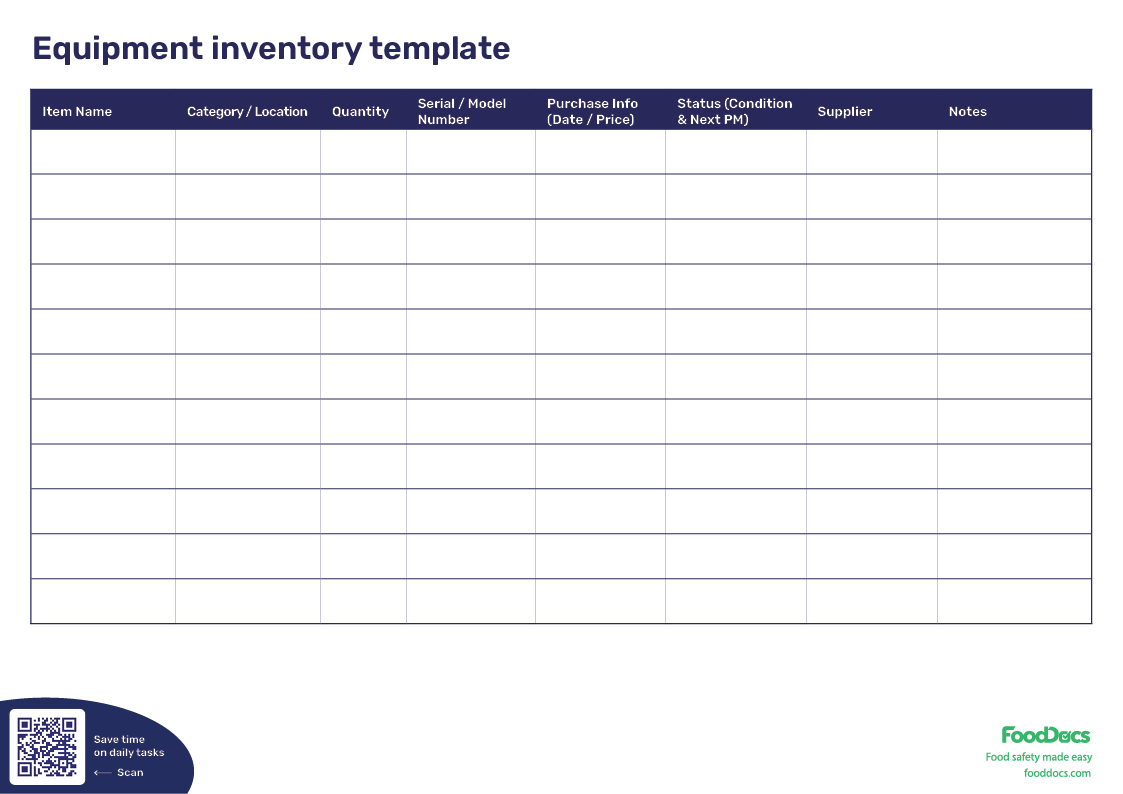
In a restaurant context, inventory includes all the physical items used to serve customers, e.g., food, ingredients, cookware, plates, utensils, cleaning supplies, and even employee uniforms.
You want oversight of all these things because shortages or overages in any of them can impact service and cost. For simplicity, many restaurants maintain separate inventory sheets or sections for food and beverages versus non-food supplies, but the principle is the same.

What are the key fields to include on every restaurant inventory template?
To set up your own inventory sheet, or evaluate a template, make sure it has the following columns:
1. Item name and category
Each product should be listed by a descriptive name that your staff recognizes and possibly grouped by category. Categories could be broad (e.g. Produce, Meat, Dairy, Dry Goods, Beverages, Cleaning Supplies) or more granular, but having them helps organize the list.
For example, “Tomatoes” under Produce, “Cheddar Cheese” under Dairy, “Bleach Cleaner” under Cleaning. Categorizing items makes it easier to find them on the list and spot if an entire group is running low.
2. Unit of measure (UOM)
This specifies how the item is counted or measured (e.g., pounds, ounces, gallons, each/count, case, etc.). Always use the same unit that you purchase or use the item in.
For example, if you purchase chicken breasts by the case, list inventory in cases and note the number of chicken breasts per case in a separate document, or if you receive flour in pounds, track it in pounds. Consistency in units is crucial for accuracy.
3. Unit price/cost
The current cost per unit for that item. This allows you to later calculate the total value on hand and also understand how an item’s price fluctuations affect your food cost. Use the most recent invoice or price list from your approved suppliers for accuracy.
4. Quantity in stock
The amount of that item you currently have. This is the figure you update during each inventory count (e.g. “5 gallons of milk” or “12 whole chickens” or “3 boxes of gloves”). It’s essentially the physical count of the item on hand.
5. Total value
This is often a formula field (i.e., the unit price multiplied by the quantity in stock) giving you the total dollar value of that item in your inventory.
For instance, 12 bottles of olive oil at $5 each equals $60 total value. Summing up all the items’ values tells you your total inventory value, which is useful for tracking purchasing and for your balance sheet.
6. Reorder level/par level (optional)
Many templates include a column for par level or minimum stock. This is a reference number that indicates when you should reorder.
For example, if the par level for salmon fillets is 5 lbs and your count shows 4 lbs, it’s time to order more. Some templates also have a “Reorder?” flag that can automatically indicate if an item is at or below par level.
7. Vendor/supplier (optional)
Recording which vendor supplies each item (and perhaps the vendor’s item code) can be helpful for reordering and tracking.
For example, noting that your Canned Tomatoes come from Supplier A vs Fresh Tomatoes from Supplier B. This is more useful in larger operations or when you have multiple sources for items.
8. Date received or expiry (optional)
Some restaurants also log the date of purchase or expiration date for batches of items, particularly for highly perishable goods.
In practice, this might be tracked outside the inventory sheet (e.g., on a separate expiration log or via date labels on the product), but a template could have a column to record expiry dates, which is great for food safety monitoring.


6. Include par levels or reorder points (if you have them)
As you become familiar with your inventory patterns, it’s very useful to set par levels for each item. A par level is the ideal minimum quantity you want on hand before reordering.
For example, you might set a par of 5 gallons for milk if you use about 4 gallons between delivery days, giving a little buffer. In your template, you can have a column for Par Level and another that flags if current stock is below par.
You may not know the perfect pars at first. They often come from experience and usage data, but you can start with educated guesses and refine over time. Par sheets are a traditional tool in restaurants to ensure you always have enough stock to meet demand without overstocking. We’ll discuss how to calculate par/reorder points in a later section.
7. Repeat the inventory process on a regular schedule
Once your inventory list is set up with all the info above, remember that it’s a living document. You need to update those stock counts regularly to keep it accurate and useful.
Most restaurants conduct a full inventory count at least once a week. Typically at week’s end or before placing the next big order. Some do it even more frequently (e.g., twice a week, or daily spot-checks for key items) depending on the volume and perishability. The key is to stick to a consistent schedule and count inventory the same way each time.
For example, you might decide to count every Sunday after closing, with the same two staff members. Consistency will make your numbers comparable period to period. Always do inventory before ordering new stock for the week. That way you base orders on what you have on hand, avoiding over-buying things you already have plenty of.
Treat inventory counts as critical tasks because they may not be the most fun, but they directly impact your food cost and bottom line.

Following these steps will create a solid restaurant inventory list that serves as the foundation of your inventory management. It might take some time to get everything listed and counted, but once set up, each subsequent cycle will be faster.
Many chefs turn inventory-taking into a routine, often doing it during a calm period (e.g., early morning or after service) when there are fewer interruptions.
Over time, you’ll likely refine your list (maybe combining or splitting categories, adding new items, removing items you no longer stock, etc.), which is perfectly normal. The goal is to have a document that gives you a clear snapshot of your kitchen’s stock at any given time.
What are the best practices for managing restaurant inventory?
A restaurant inventory list is only helpful inasmuch as it's used. Managing it effectively day-to-day is what drives results like lower food costs and smoother operations. Here are some best practices and tips tailored for restaurant inventory management:
Use precise measuring tools during inventory counts to improve accuracy
Make sure staff physically count or measure each item; don’t rely on guessing. For bulk ingredients, use scales or measuring pitchers to quantify what's on hand (e.g., weigh that open bag of shrimp). For liquids, graduated containers help. Accurate counts are crucial because even small errors can throw off your ordering and food-cost calculations.
Implement the First-In, First-Out (FIFO) method and clear labeling
FIFO is the golden rule of food inventory. Always use the oldest stock first. When new shipments arrive, store them behind the older products on the shelf, so the older items get picked for use first.
Labeling everything with the date it was received (or the prep date for house-made items). Use easy-to-read date labels, including color-coded tags for different days, so anyone can see at a glance which items should be used up as a priority.
Rigorously following FIFO will help you avoid finding forgotten food at the back of the fridge two months past its use-by date. FIFO isn’t just about saving money. It's a food safety practice that helps ensure freshness.

Keep the storage areas organized
A cluttered stockroom or walk-in fridge can lead to miscounts and missed items. Group items logically on shelves (e.g., all the baking supplies on one shelf, meats in a certain cooler section, etc.) and label shelf locations if necessary. This way, when doing inventory, you can go section by section in order.
Organization also helps during service, so cooks can find ingredients faster, and when receiving orders (e.g., new stock can quickly be put in the correct place). An organized storage also deters theft and prevents accidents (like a heavy box hidden precariously).
If space is tight, invest in proper shelving rather than piling things on the floor.
Schedule and staff your inventory counts consistently
Decide how often to take inventory and stick with it. Many restaurants do a full count weekly, with quick checks on key items daily. At minimum, do it once a month, though weekly is highly recommended for close control. Perform counts at the same time (e.g., every Sunday night) because inventory levels fluctuate during the week. Consistency helps eliminate variables.
It’s also wise to have the same people responsible for inventory each time. When a dedicated inventory team (even if it’s just you and one manager) takes ownership, they become very familiar with the process and less likely to make errors. They also know where everything is.
Communicate to your staff that accurate inventory counts lead to better ordering, less waste, and ultimately a healthier business (which benefits everyone’s job security).
Use par levels and track variances
Earlier, we discussed setting par levels (the ideal stock level for each item). Once you establish these, use them. Before placing orders, compare current inventory to par because the difference tells you roughly how much to order.
For example, if par for bacon is 20 lbs and you have 8 lbs left, you should order ~12 lbs. Par levels should be adjusted over time based on actual usage and seasonality, but they provide a baseline.
If you notice big variances (e.g., you should have 5 steaks left according to usage but you only count 2), investigate the cause. It could be due to waste, over-portioning, or even theft.

The best restaurant management software, including digital inventory tools can generate variance reports automatically, but even manually, you can compare what you think you should have (starting stock + received - sold) against what you counted. This helps catch problems like portion creep or employee meal freebies that weren’t accounted for.
Minimize waste and theft
Keep a log of any waste (spills, spoiled produce, burned food) and subtract it from inventory counts so you maintain accuracy. This log also highlights areas to improve (e.g., if you’re frequently discarding a certain item, maybe you’re ordering too much of it or need to improve storage).
On the theft side, unfortunately, internal theft is a reality in the industry. Having two people count together and storing valuable items like expensive liquor, truffles, and similar items securely can deter theft. Tracking inventory closely will highlight patterns that could indicate pilferage (such as consistently missing bottles).
Let staff know you’re monitoring usage to foster a culture of transparency and encourage accountability.
Leverage technology when possible
While spreadsheets are great, consider using inventory management software or apps if your operation grows. Many of the best POS systems offer an inventory module that deducts ingredients as menu items are sold (a perpetual inventory system).
There are also standalone apps where staff can count via a tablet or phone, even scanning barcodes for accuracy. These tools can save time and reduce human error. Some will automatically alert you when stock is low or generate order lists, and they can provide detailed reports (like inventory turnover by item, value on hand, etc.).
However, they also require diligent setup and maintenance. A common approach is to use spreadsheets for periodic counts and then input the data into software for analysis.
Find what level of tech works for you and don’t shy away from it if it can improve efficiency. Even using a mobile spreadsheet on an iPad instead of pen and paper can speed up the process and cut down transcription errors.
Conduct inventory audits before big events or menu changes
If you’re about to enter a busy season such as Summer or planning to roll out a new menu, it’s wise to do an extra thorough inventory check beforehand. This ensures you start with accurate data and adequate stock of any new ingredients.
After a major event like catering a big party or a holiday weekend rush, recount key items to realign your numbers. These special inventories help you stay on top of unusual demand swings that the regular schedule might miss.
Restaurants that put these tips into practice will build an inventory system that keeps your kitchen running smoothly and your costs in check. Inventory management might not be the most glamorous aspect of culinary work, but it is absolutely one of the most important.
As the saying goes, “You can’t manage what you don’t measure.” So measure that inventory religiously, and you’ll reap the benefits in food cost percentages and a well-prepared kitchen.
What are periodic versus perpetual inventory methods?
Most kitchens use a periodic method. You shut the back door, count everything on hand once a day, once a week, or once a month, then update the totals in your sheet. It's cheap and quick, and it works well when you have one location and a manageable menu.
A perpetual method links your point of sale to inventory software. Every plate that sells triggers an automatic subtraction of each ingredient in that plate. Counts stay up to date around the clock, and the system can flag low stock in real time. You still do a physical count now and then to catch errors, but the day‑to‑day math happens on its own.
Which should you choose?
- If you run a single site and have not invested in tech yet, start with periodic counts every week.
- If you manage high volume or multiple locations and already have a modern point of sale, a perpetual add‑on can save hours and give tighter control.
- Many operators blend the two: a perpetual system for high-cost center‑of‑plate items and a simple weekly count for dry goods and paper supplies.
As always, pick whatever method fits your size, budget, and staff skill today, and upgrade when volume or complexity grows.
Which formulas should you know when calculating restaurant inventory?
Some basic math and analysis go a long way in understanding a couple of key calculations. You can gain insight into how well your restaurant is controlling inventory and food cost. Let’s look at two fundamental formulas: inventory usage (Cost of Goods Sold) and inventory turnover.

1. Inventory usage/cost of goods sold (COGS)
This formula answers the question “How much product did we use over a given period?” In restaurant terms, it effectively calculates your Cost of Goods Sold for that period (food and beverage cost). The formula is straightforward:
Beginning Inventory + Purchases - Ending Inventory = Usage
Suppose, for example, at the start of the week, you have $5,000 worth of food inventory. During the week, you purchase $2,000 more in food. At the end of the week, after sales and other adjustments, you count $4,000 worth of inventory left.
Plugging in the formula: $5,000 + $2,000 - $4,000 = $3,000 used. This $3,000 is what’s gone from stock to produce the food you sold (or was wasted). It should roughly equate to the food cost portion of your sales for that week. The formula can be applied to a category (e.g., just meat inventory) or all inventory.
This calculation is powerful because it helps you track food cost as a function of usage. If you know your sales for the week were, say, $10,000 and you “used” $3,000 in product, then your food cost percentage is 30%.
Monitoring this over time lets you see if you’re improving or if there’s a problem (e.g., rising costs or waste). The formula also helps pinpoint losses so that if the usage seems higher than it should given your sales, you might be dealing with waste, theft, or portioning issues. Remember to include adjustments for any major waste or comped meals in these numbers for accuracy.
According to inventory management experts, restaurant inventory usage is calculated with that exact formula. It’s simple but vital to understanding where your stock is going.
2. Inventory Turnover Ratio
This metric tells you how many times you cycle through your inventory in a given period. It’s often measured monthly for restaurants. The formula is:
Inventory Turnover = COGS for the period / Average Inventory Value
Where “average inventory value” is typically (Beginning Inventory + Ending Inventory) / 2 for the period. If we use the week example above: usage was $3,000, average inventory = ($5,000 + $4,000)/2 = $4,500. The turnover = 3,000 / 4,500 = 0.67 times in that one week. Multiply by 4 (for four weeks) and that’s about 2.7 times per month. Restaurants often calculate this monthly or yearly.
Why care about restaurant inventory turnover?
It indicates how efficiently you’re using your stock.
- Higher turnover means you are buying and using inventory quickly so nothing sits around too long, which is generally good for freshness and cash flow. But too high could mean you risk stockouts if something sells fast.
- Lower turnover means inventory sits longer, but too low and you may be overstocked or carrying stale items.
In the restaurant industry, a common rule of thumb is to target a food inventory turnover of 4 to 6 times per month, which translates to roughly 5-7 days worth of inventory on hand.
You ideally don’t want more than about a week’s worth of food inventory in storage at any time. This ensures freshness and that your money isn’t tied up on the shelves.
If your turnover is lower (say 2x a month, meaning ~15 days of inventory on hand), you might be over-ordering and could face more spoilage. If it’s excessively high (say 8x a month, or only 3-4 days of inventory on hand), you may be cutting it too close and risk running out of stock if deliveries are delayed or demand surges.
Different sub-sections of inventory might have different appropriate turnovers. Perishables like produce or fresh seafood will turnover faster (you wouldn’t keep 2 weeks of fish inventory, hopefully), whereas non-perishables and alcohol can be a bit slower.
But as a general benchmark, 5 days’ inventory on hand is considered healthy for food. Many successful restaurants operate with one or two deliveries a week for most items, planning to use everything up in between deliveries.
Calculating your turnover will help you answer the question: How much inventory should a restaurant carry?
And the answer is: enough to meet demand until the next delivery, plus a small safety buffer. This is typically about a week’s worth of food, no more. We’ll elaborate on adjusting inventory levels in the next section, but knowing these numbers helps you quantify it.
Get comfortable with these formulas because they can be done in a spreadsheet once you have your inventory values. They will give you a deeper understanding of your operation’s efficiency.
If you notice your usage (COGS) creeping up or your turnover slowing down, it’s a signal to investigate and take action (e.g., trim down orders, run a special to move product, tighten portion control, etc.).
How to optimize restaurant inventory levels
Maintaining the right amount of inventory is a balancing act. Carry too much, and you tie up cash and risk spoilage. Carry too little, and you’ll run out of items and disrupt service.
How much inventory should a restaurant carry?
While there’s no one-size-fits-all answer, many restaurants keep roughly 5 to 7 days’ worth of stock for food items, which lines up with receiving deliveries once or twice a week.
Practically, if you get a produce delivery every Monday, you’d aim to have just enough produce to last until the next delivery (plus a small buffer in case of a late truck or a sudden busy night).

What factors influence a restaurant's inventory levels?
Several factors influence the ideal inventory level for your restaurant, including:
Delivery frequency and lead times
If your suppliers deliver daily, you can afford to keep very low inventory (you might only keep 1-2 days of product on hand). Conversely, if you can only get certain supplies once a week, you must stock enough to last all week.
Consider the lead time, which is the time between placing an order and receiving it. You should always have at least the amount you use during that lead time, plus a safety margin.
For example, if you use 10 cases of chicken a week and it takes 7 days to get a new order in, you’ll want a bit more than 10 cases on hand after a delivery. Longer lead times usually equal more inventory needed to avoid running out.
Storage capacity
Your storage space sets a physical limit. A small cafe with one upright fridge simply can’t hold as much inventory as a large restaurant with a walk-in cooler and freezer.
If you’re limited on space, you’ll need more frequent deliveries and to carry a lean inventory. Overstocking a small space can also reduce efficiency (if stuff is crammed, you can’t find it or circulate air properly).
Storage constraints often require lower inventory levels and just-in-time ordering.

Michael Worbanski
Human Resources and Operations Safety Specialist
Gruppo Terroni
Here are some ways FoodDocs can benefit your kitchen and complement your inventory management:
- Expiration date monitoring: Instead of relying on sticky notes or Sharpie dates alone, you can log products in FoodDocs and receive alerts or see at a glance what’s nearing its end-of-life. This feature ties in perfectly with FIFO. Knowing what’s due to expire, you can prioritize those items in production or specials. You’ll drastically cut down on food waste by never forgetting something in the back of the cooler until it’s too late.


- Digital checklists for inventory and storage tasks: FoodDocs allows you to create or use predefined checklists and monitoring logs for various tasks, including checking storage conditions. You can have a daily “Fridge/Freezer temperature check” or “Dry storage cleanliness check” that staff complete on a tablet or phone. This ensures your inventory is kept in proper conditions. All records are stored in the cloud, so you have proof for health inspectors that you are monitoring storage and expiration diligently. And it saves time because you no longer have to deal with shuffling papers or binders. Staff get their tasks on a mobile app and check them off in real time.

- Training and consistency: FoodDocs includes educative instructions and the ability to attach photos or videos to tasks. This means you can standardize how inventory is managed. New staff get clear guidance (for instance, a FIFO checklist with a short video on how to rotate stock properly). Consistency in procedures (e.g., always logging deliveries and sanitizing storage bins weekly) improves your overall inventory quality. In short, FoodDocs helps maintain a culture of food safety where everyone knows the routines to keep food safe and avoid waste.


If you’re already keeping detailed inventory records, adding FoodDocs could take your operation to the next level by layering on automated safety checks and reminders.
And if your current food safety logging is still kept on paper, FoodDocs can bring it all together to get you started in within 15 minutes, which will support how you handle inventory, which means lower costs, less waste, a safer kitchen, and happier customers.
Embracing digital tools like FoodDocs lets chefs and managers spend less time on paperwork and more time on cooking and analysis. It’s about working smarter, not harder while keeping your kitchen safe, your compliance in check, and your inventory in peak condition.

![]() An automated setup enables you to go digital in 15 minutes
An automated setup enables you to go digital in 15 minutes
![]() Our app notifications help your team to remember all daily tasks bam
Our app notifications help your team to remember all daily tasks bam
![]() Save time on supervising and use automatically filled monitoring sheets
Save time on supervising and use automatically filled monitoring sheets