Please note:
There are two types of monitoring checks in FoodDocs:
-
Detailed Tasks — include specific inputs like temperatures, products, dates, etc.
-
Checklists — simple lists of items your team can mark as done.
In FoodDocs, you can set up any checklists and complete them in the mobile app. Most used are Cleaning Checklist, Pest Control Checklist and Opening/ Closing Checklist.
Step-by-Step Checklist Setup
1. Log into FoodDocs
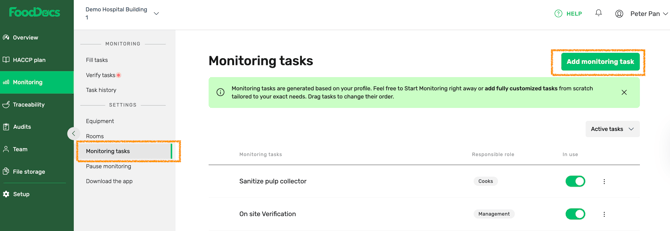
Go to your desktop app: Monitoring > Settings > Monitoring tasks.
2. Add a New Task
-
Click Add monitoring task (top right).
-
Enter a name for the checklist.
-
Select Checklist as the task type.
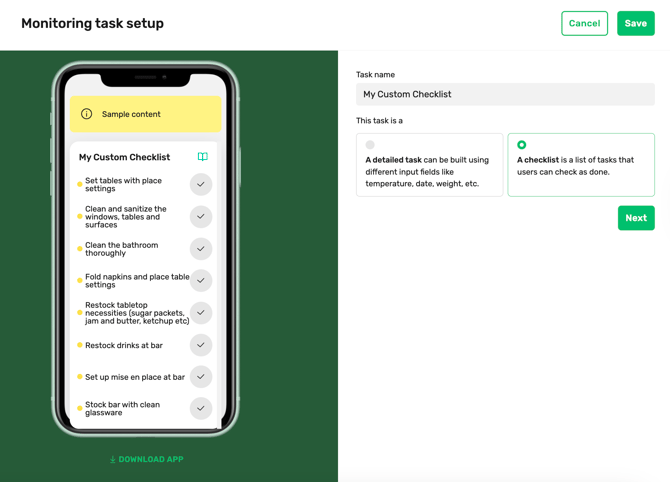
Please note:You can only choose the task type once — if you need a different type later, create a new task.
3. Relating Your Checklist to Rooms or Equipment
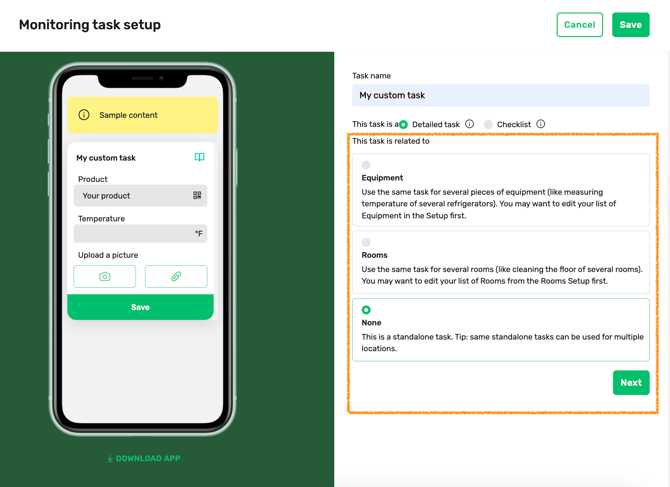
Checklists can be linked to your business structure for better organization:
| Option | What It Means |
| Equipment | Checklist applies to a specific item (e.g., fryer or fridge). |
| Rooms | Checklist applies to a specific room or area (e.g., kitchen). |
| None |
Company-wide checklist, not tied to any room or equipment OR Location-wide checklist, not tied to any rooms or equipment (see examples below) |
TIP: Linking checklists to rooms/equipment helps your team filter and complete the right tasks faster.
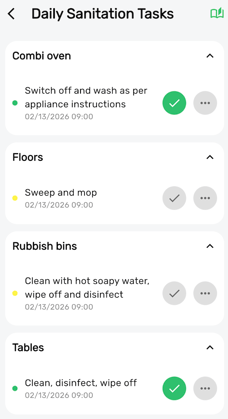
Related to the Equipment example:
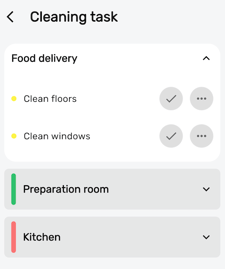
Related to the Rooms example:
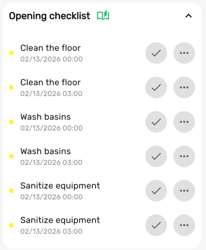
Related to the None example:
4. Relating Your Checklist to Locations
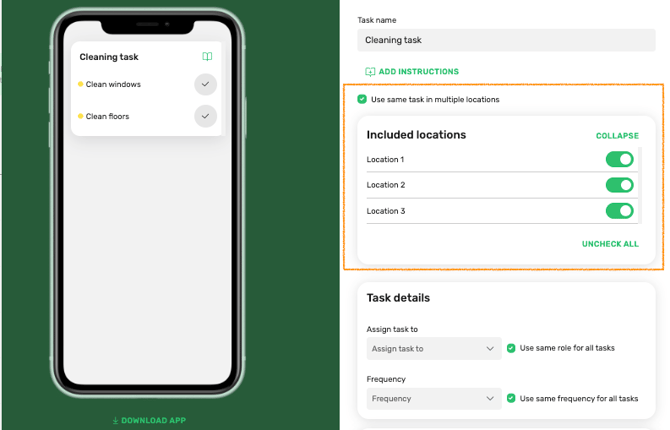
NB! Location selection is available only for Tasks with the relation type None
-
Choose which locations this specific task is applicable to.
5. Task details: Set Frequency & Assign Roles
-
Choose how often tasks should be completed (e.g., daily, weekly).
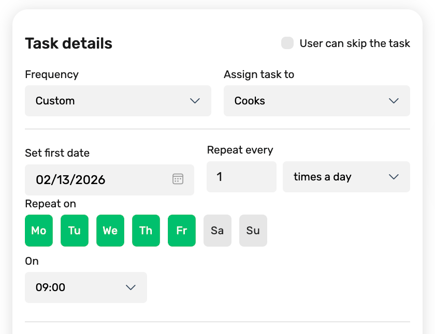
- Specify the frequency of the checklist and assign it to a team role.
- Assign a team role — only users with that role will see this checklist in their mobile app.
Please note: You can also assign different task frequencies to different roles within one checklist.
Only team members with the same responsible role will see the task in their FoodDocs mobile app.
Companywide tasks require a companywide role.
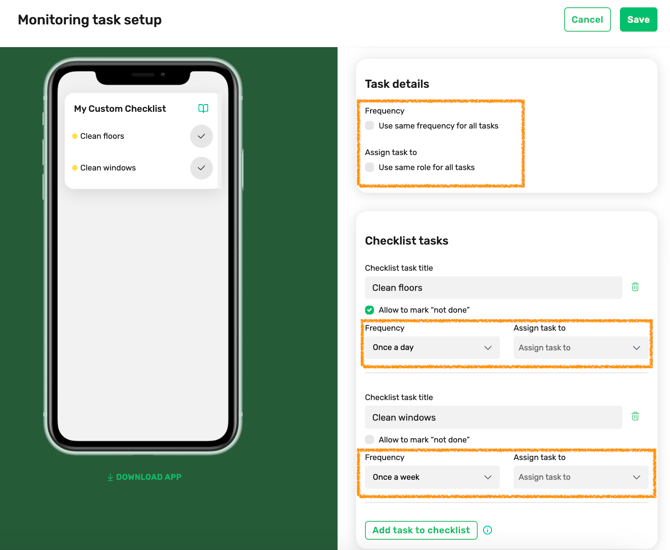
6. Task fields: Add Checklist Items
-
Click Add task to checklist to include specific steps your team must complete.
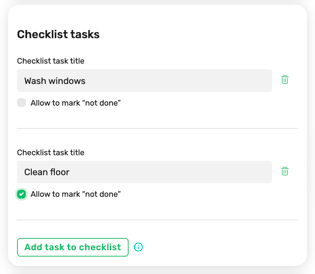
-
When you’re finished adding tasks to the checklist, click Save.
6. Optional: Enable Verification
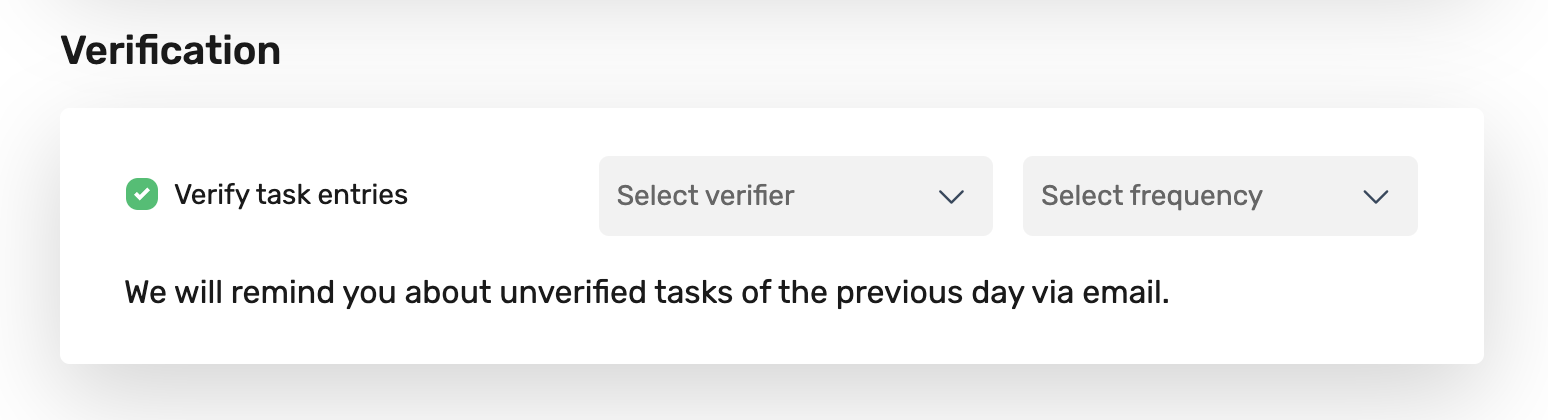
Turn on Verification if you want supervisors or managers to approve task completion.
This adds an extra layer of quality control and helps ensure compliance.
- Activate Verification if you want to verify all the monitoring made by employees.
- NB! Companywide tasks require a companywide role as a verifier.
How to Complete the Checklist in the Mobile App
After setup, your team uses the FoodDocs app to:
- Download FoodDocs Mobile App
-
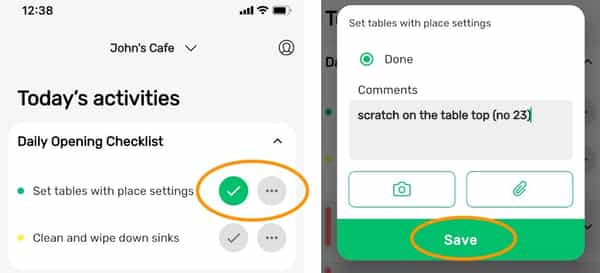
Open the checklist under Today’s Activities.
-
Mark items as done.
-
Tap the three dots to add comments or attach photos/files.
-
Save — all entries are automatically logged.
Please note: Completed logs are stored under: Monitoring > Task history in your dashboard. See more on how to see the reports.